Configuration and Implementation
Overview
Checkout Page is a hosted Brick payment experience that combines:
- dashboard-managed configuration for branding and embed settings
- API-driven session creation for each transaction
This setup allows merchants to keep page styling and operational settings in the Brick Dashboard, while their backend creates transaction-specific checkout sessions through the API.
Where to Configure Checkout Page
Open the Brick Dashboard and navigate to Settings > Checkout
This page contains the merchant-level configuration for the hosted checkout experience.
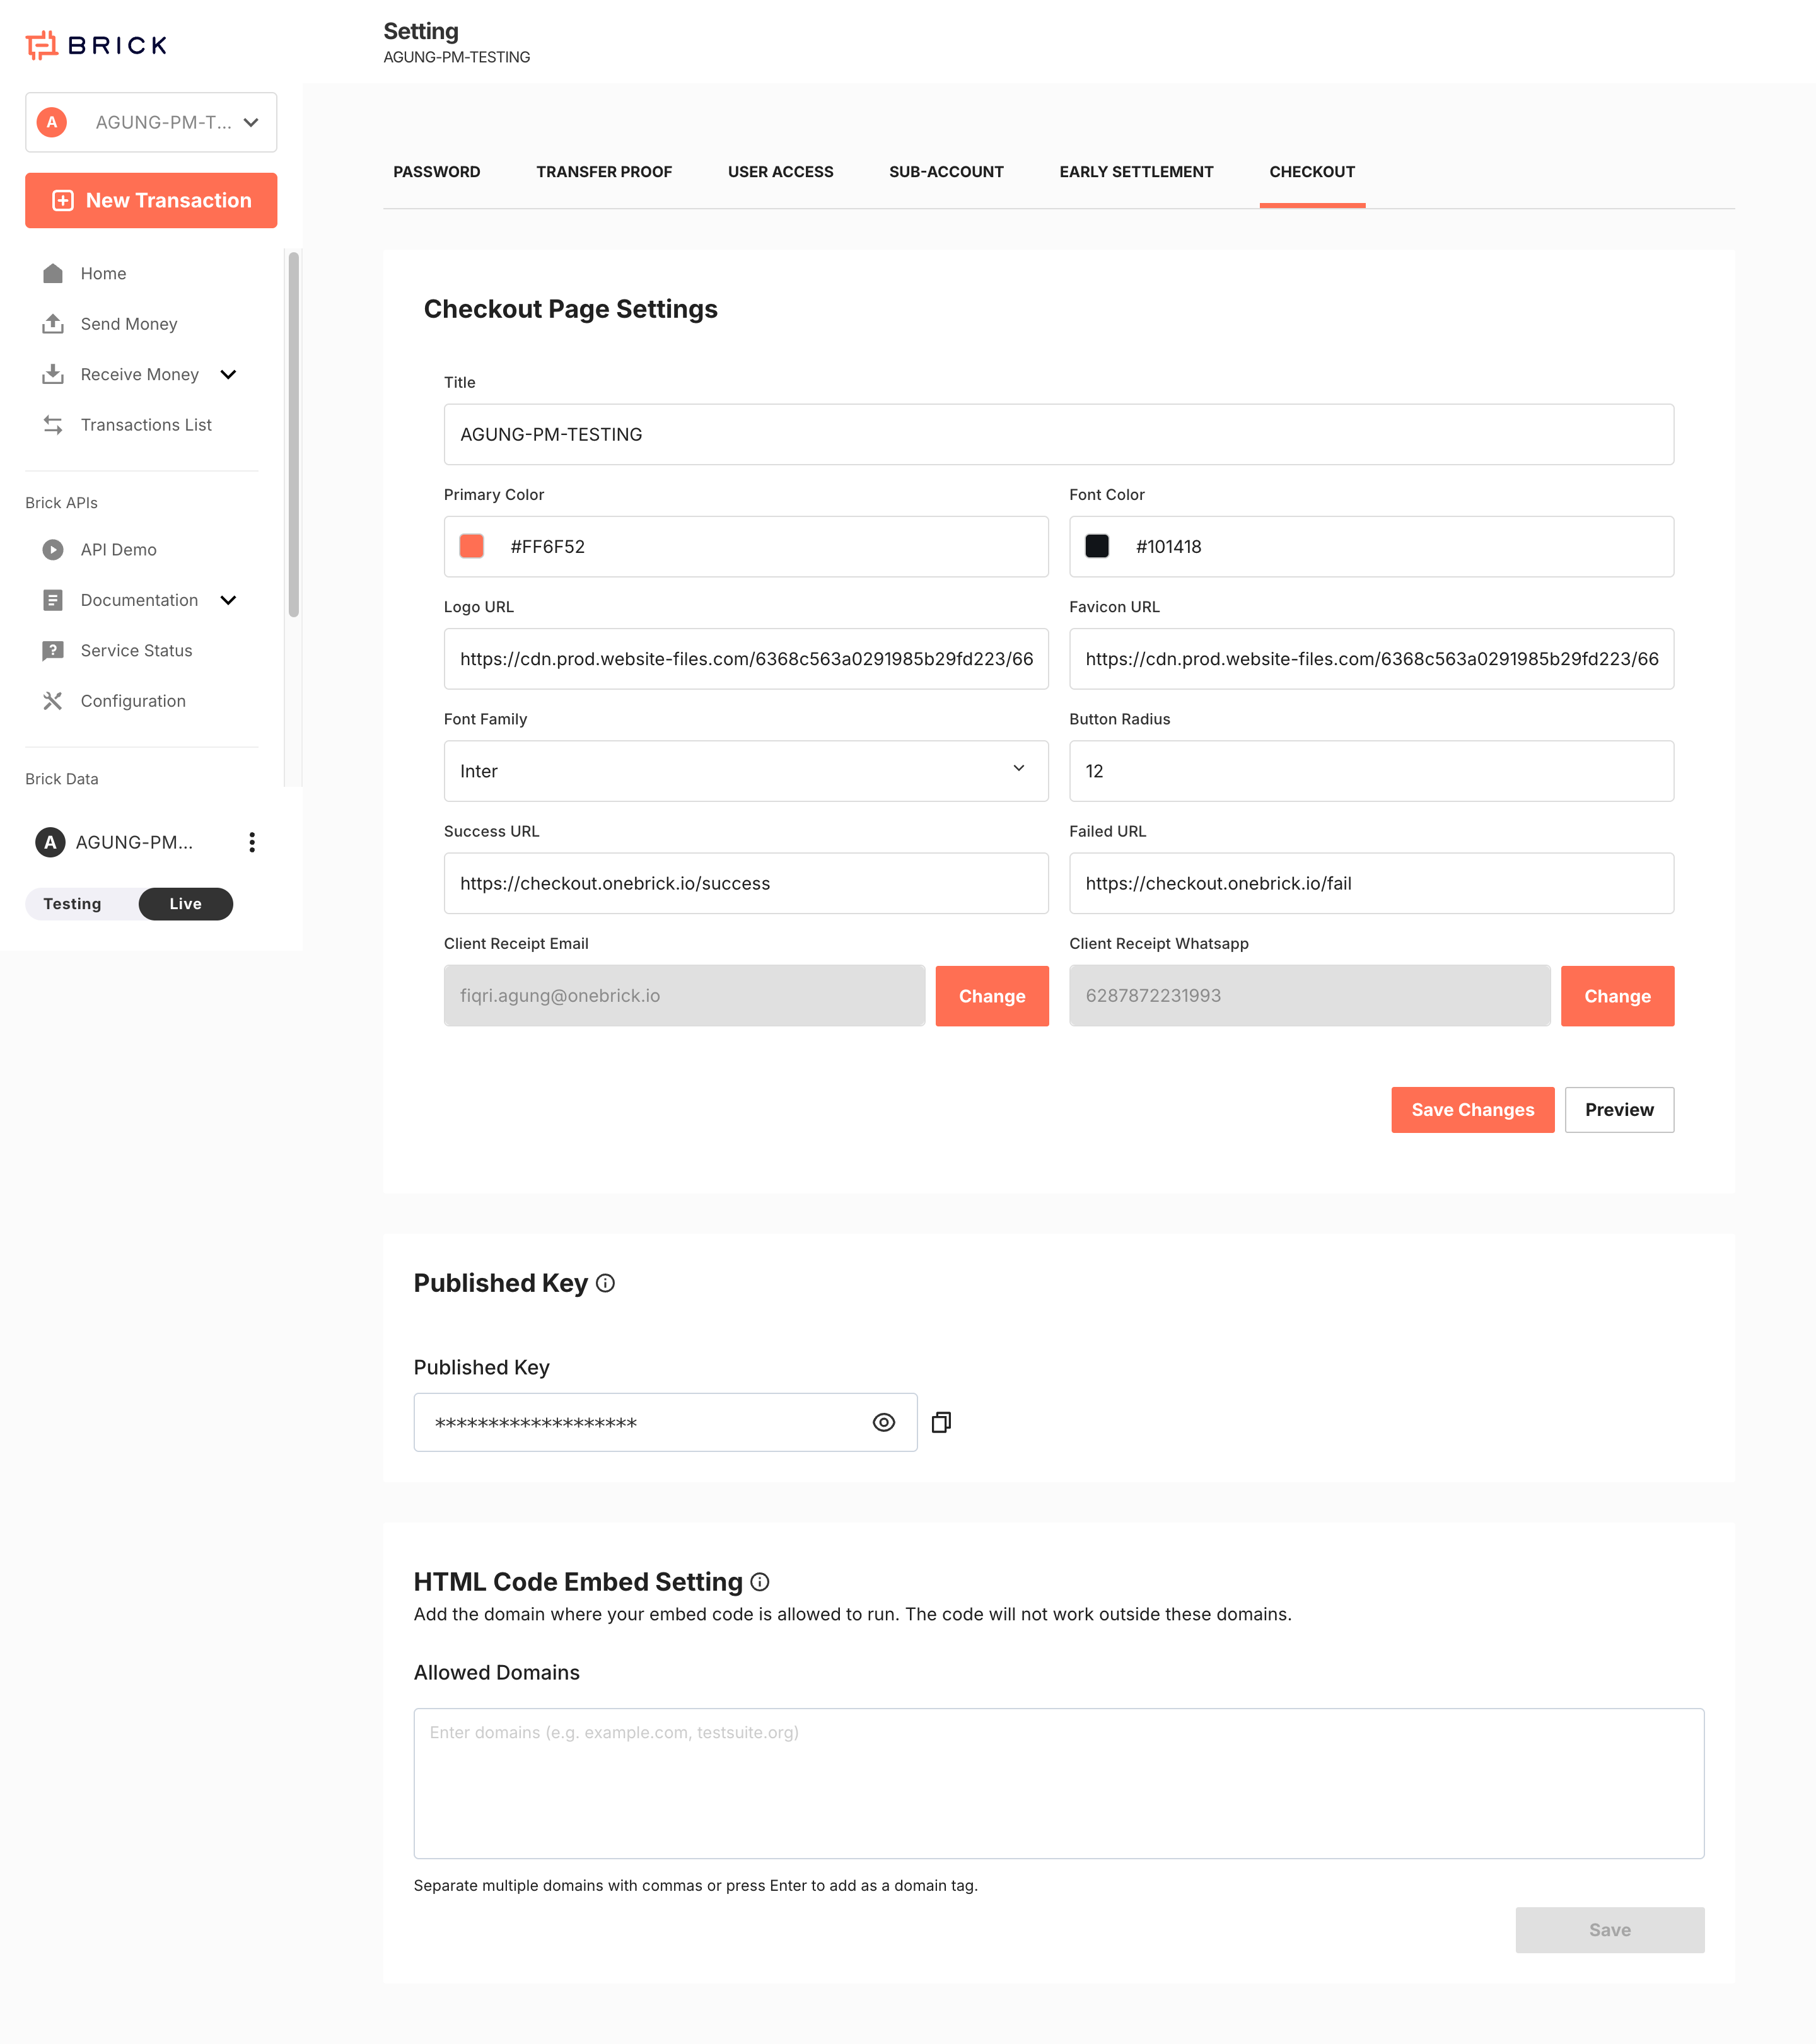
Checkout Page Configuration
The following settings are managed in the Dashboard UI.
| Field | Description | Implementation Notes |
|---|---|---|
Title | Merchant or product title displayed on the hosted page | Use a customer-facing label |
Primary Color | Main brand accent color | Applied to primary UI elements |
Font Color | Main text color | Ensure sufficient contrast |
Logo URL | Logo displayed on the checkout page | Must be publicly accessible |
Favicon URL | Browser tab icon | Must be publicly accessible |
Font Family | Typography setting for the hosted page | Use a supported font |
Button Radius | Button corner radius | Controls visual style |
Success URL | Redirect URL after successful completion | Do not use as the only payment confirmation source |
Failed URL | Redirect URL after failure or cancellation | Use for UX only |
Client Receipt Email | Receipt recipient email | Managed in dashboard |
Client Receipt WhatsApp | Receipt recipient WhatsApp number | Managed in dashboard |
Published Key | Public key for Checkout Page frontend initialization | Safe for frontend usage |
Allowed Domains | Domain allowlist for HTML embed execution | Required for embed flows |
Configuration Responsibilities
Dashboard Responsibilities
The dashboard controls:
- hosted page branding
- redirect behavior
- published key generation
- allowed domains for embedded usage
- receipt contact configuration
Backend Responsibilities
Your backend controls:
- generating a public access token
- creating a checkout session
- storing transaction references
- receiving callbacks
- checking transaction status when needed
Credential Model
Checkout Page uses different credentials for different layers.
| Credential | Used By | Purpose |
|---|---|---|
Published Key | Frontend | Loads merchant checkout configuration |
Client ID | Backend | Used to generate a public access token |
Client Secret | Backend | Used to generate a public access token |
publicAccessToken | Backend API call | Authorizes protected Checkout Page endpoints |
Important rules:
- never expose
Client Secretin frontend code - do not use
Published Keyas an API credential - generate a fresh
publicAccessTokenclose to the time of use
Frontend Entry Points
Checkout Page can be initialized in two ways.
| Entry Point | Purpose |
|---|---|
https://checkout.onebrick.io/?pubkey=<Published Key> | Loads the branded hosted checkout frontend |
checkoutUrl returned by POST /v1/payments/checkout | Opens a transaction-specific payment session |
Use the Published Key when you need the configured hosted frontend or embed flow.
Use the API-generated checkoutUrl when a customer must complete a specific transaction.
Recommended Implementation Flow
Step 1. Configure the Checkout Page in the Dashboard
Before sending any live traffic:
- Set the page title, colors, logo, and favicon.
- Configure
Success URLandFailed URL. - Review receipt destination fields if used.
- Copy the
Published Key. - Add allowed domains if you plan to embed the page.
Step 2. Generate a Public Access Token
Protected Checkout Page API calls require a public access token.
Endpoint
Code
Example
Code
Example Response
Code
Step 3. Create the Checkout Session
Call the Checkout Page create endpoint from your backend.
Endpoint
Code
Headers
Code
Example Request
Code
Optional Fixed-Amount Example
Code
Example cURL
Code
Example Response
Code
Step 4. Present the Checkout to the Customer
You can present the checkout in either of these patterns:
- redirect the customer to
checkoutUrl - open
checkoutUrlfrom a button or CTA - initialize the branded Checkout Page frontend using the
Published Key - embed the page if the origin domain is allowlisted
Step 5. Confirm the Payment Outcome
Do not rely only on redirect URLs.
Use:
- Brick callbacks as the source of truth
- status checks for operational verification when required
HTML Embed Configuration
If you plan to embed Checkout Page:
- Add all allowed origins under
Allowed Domains. - Save the configuration.
- Test the embed from each approved domain.
If the origin is not allowlisted, the hosted page or related status checks may fail due to origin restrictions.
Implementation Constraints
Token Constraints
- public access tokens are short-lived
- tested token responses state that they are valid for 5 minutes and one-time use
- generate a new token before protected requests
Environment Constraints
| Environment | Base URL |
|---|---|
| Sandbox | https://sandbox.onebrick.io |
| Production | https://api.onebrick.io |
Use explicit https:// in all base URLs.
Avoid:
Code
HTTP redirects may cause some clients to retry as GET, which can trigger 405 method_not_allowed.
Reference Constraints
externalIdshould be unique per transaction- store both your
externalIdand Brick's returned transaction ID
Channel Constraints
qrisandvirtual_accountare supported in the tested collection- QR Code amount limits and Virtual Account limits follow the Receive Money product rules configured by Brick
Troubleshooting
400 Bad Request
Typical causes:
- missing required fields
- invalid JSON
- wrong field type
Best practice:
- send valid JSON only
- do not place comments inside JSON request bodies
401 Unauthorized
Typical causes:
- invalid token
- missing token
- expired token
- wrong environment credentials
405 Method Not Allowed
Typical causes:
- using
GETinstead ofPOSTfor/v1/payments/checkout - posting to an
http://URL and letting the client follow a redirect
Recommended Backend Data to Store
For each Checkout Page session, store at minimum:
externalId- Brick transaction ID
checkoutUrlstatuscurrencyamountdescription- creation timestamp
This will help with reconciliation, support investigation, and callback matching.
Go-Live Checklist
- Confirm production access is enabled.
- Configure production callback URLs.
- Review all branding fields under
Settings > Checkout. - Validate
Success URLandFailed URL. - Copy and verify the
Published Key. - Add all approved domains to
Allowed Domains. - Test one open-amount and one fixed-amount flow in sandbox.
- Validate callbacks before switching to production.