Bank Statement Analysis
Bank Statement Analysis is a Brick Financial Insight workflow that turns completed OCR Bank Statement results into structured financial insights. It summarizes income, expenses, cashflow, balances, transaction categories, and report outputs from OCR-extracted bank statement data.
Use Bank Statement Analysis after OCR Bank Statement processing is completed and your team needs a structured review of bank statement activity. The analysis can support internal review, underwriting preparation, risk workflows, reporting, and customer-support investigation.
⸻
Analysis Result Content
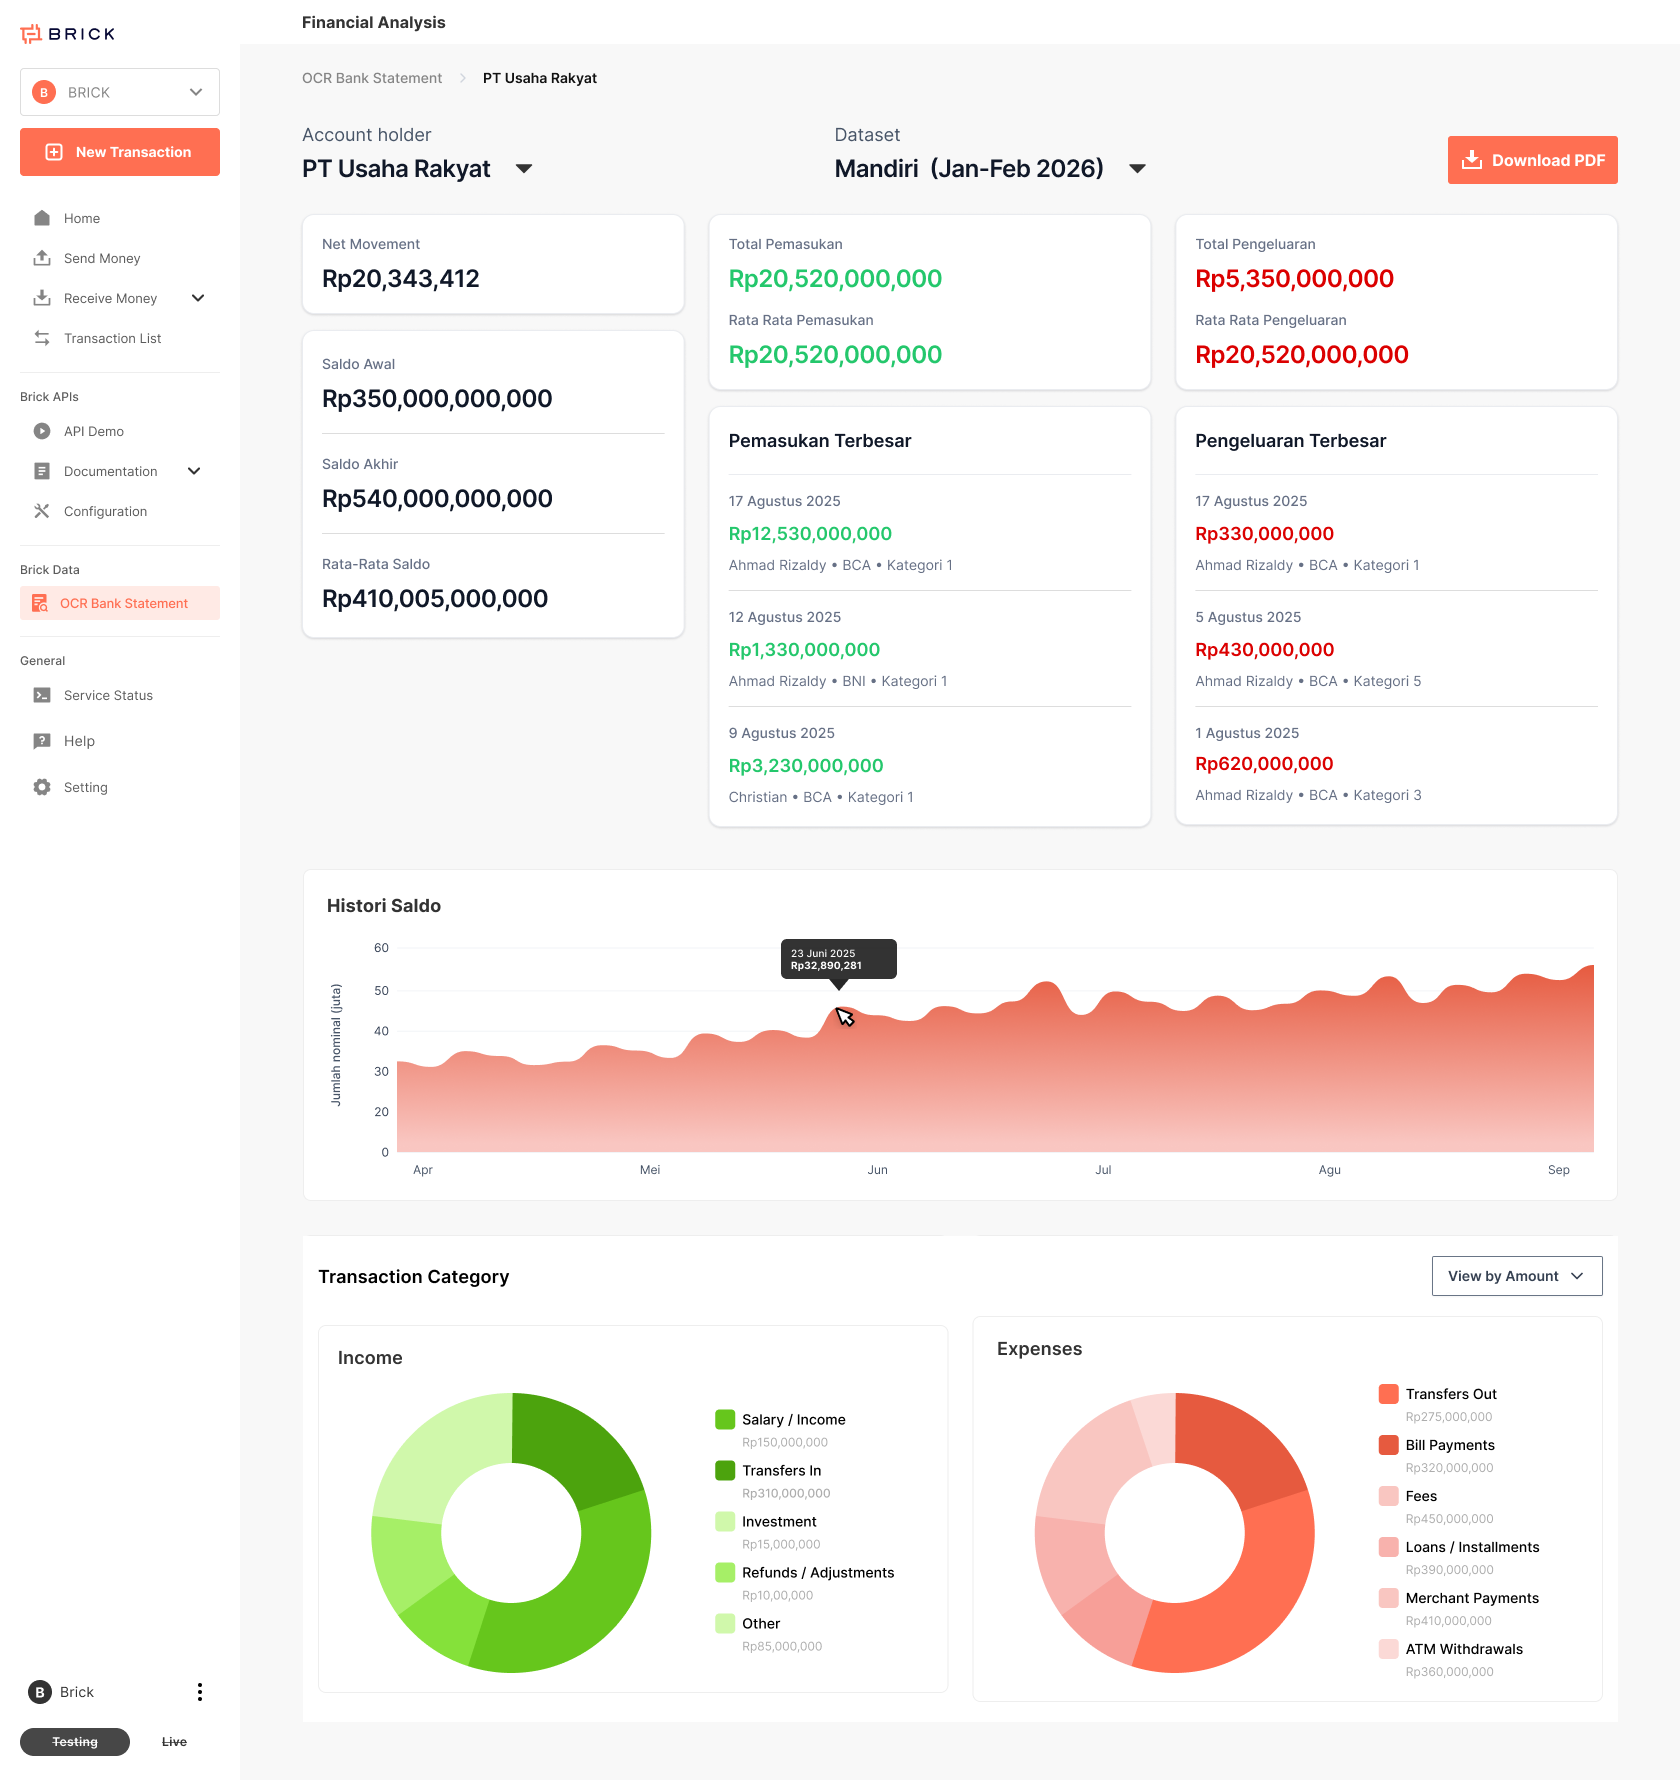
Result Header
Code
KPI Summary
Code
Transaction Categorization
Income
Code
Expense
Code
This enables faster, more consistent financial review through standardized and automated outputs.
🚧 User Eligibility
The system enforces eligibility at both the feature and page level to ensure controlled access to real analysis data.
✅ Eligible Users Can:
• Run real bank statement analysis
• View actual financial results
• Access Analysis History
• Download official PDF analysis reports
• Revisit past analysis sessions⚠️ Non-Eligible Users (shows from banner page):
• Can access the analysis UI
• Can select OCR statements
• Can trigger sample / demo analysis
• ❌ Cannot access Analysis History
• ❌ Cannot download real PDF reportsThis allows teams to preview functionality before enabling full access
How to Use Bank Statement Analysis
Follow these steps to analyze completed OCR bank statements.
Step 1 — Open the OCR Bank Statement Page
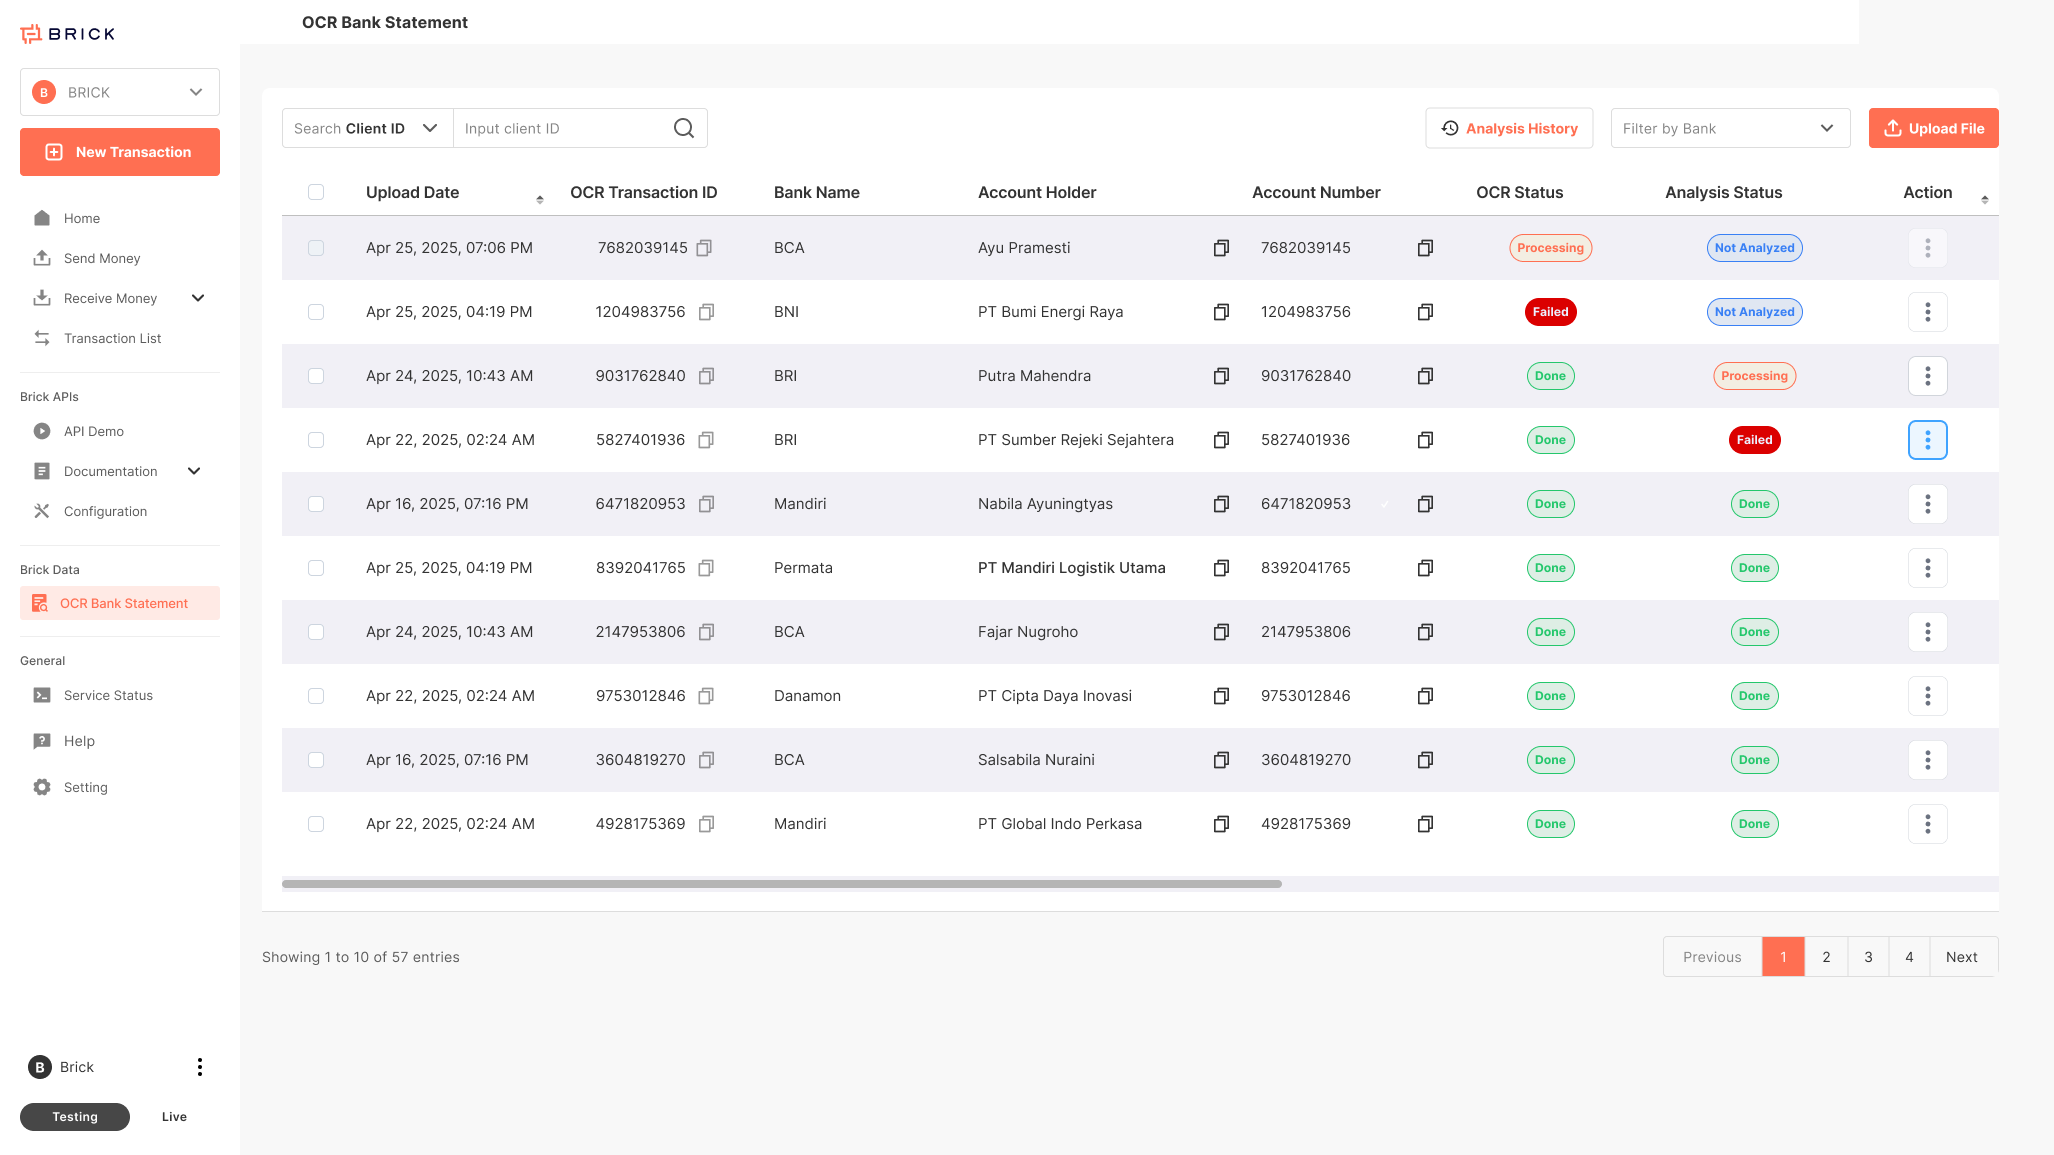
- Navigate to the OCR Bank Statement page.
- Locate the ocr statement you want to analyze (status must be Completed).
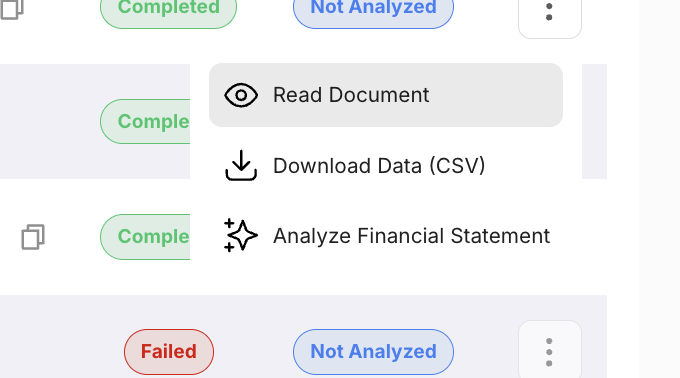
- Click the More (⋮) button on the right side of the statement row.
- From the dropdown menu, select:✨ Analyze Financial Statement
Step 2 — Analysis Starts (Processing)
Once you click Analyze Financial Statement:
- The system automatically starts the analysis process.
- The status will change to: 🟠 Processing
Analysis runs in the background asynchronously.
You may leave the page and return later.
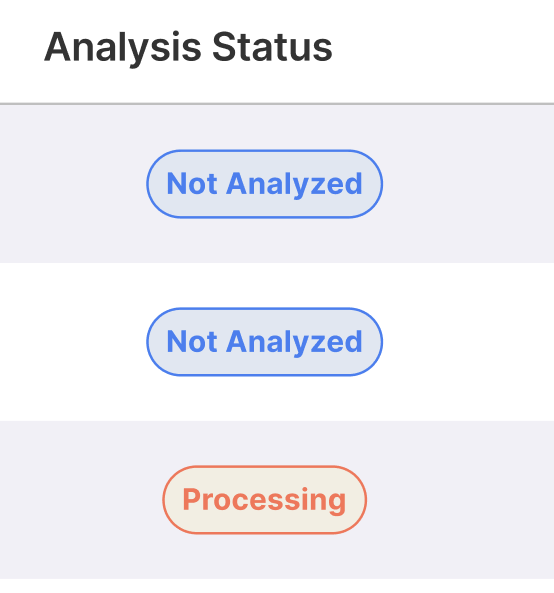
📘 Analysis Status States
• Not Analysed – OCR files have not yet been analyzed
• Processing – analysis is running
• Done – analysis completed successfully
• Failed – analysis failed
Step 3 — Analysis Completed
When the process finishes successfully:
• The status will change to: 🟢 Completed
To view the result:
1. Click the More (⋮) button again
2. Select 📄 View Analyzed Result
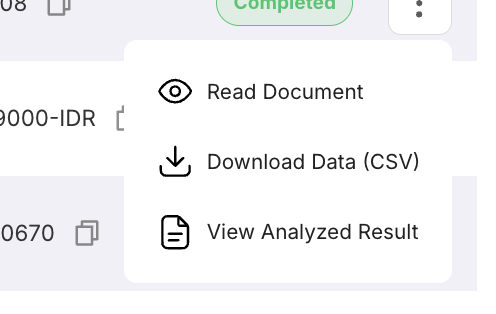
The system will open the analysis dashboard with:
• KPI summary (Income, Expense, Balance)
• Cashflow trends
• Category breakdown charts
• Largest income & expense transactions
Alternative Way — View from Analysis History
You can also access completed analyses from:

📜 Analysis History
1. Click Analysis History
2. View the list of completed analysis transactions
3. Click More (⋮)
4. Select View Analyzed Result
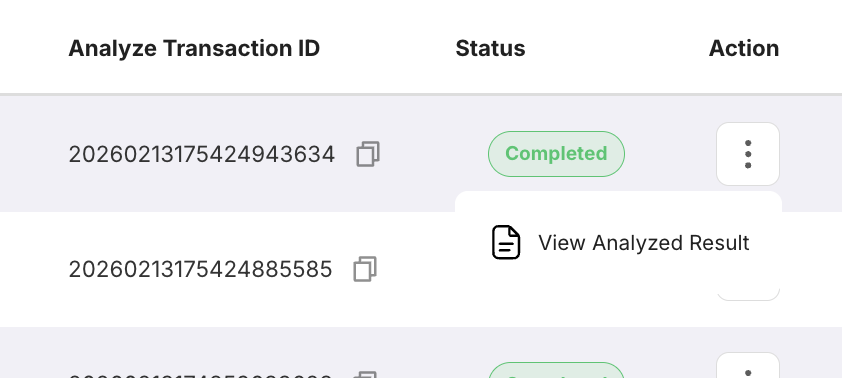
This is useful when:
• You want to revisit previous analysis
• You forgot which OCR file was used
• You want to review historical results
Step 4 - Download Generated Report

Once the analysis status is Completed:
1. Open the analyzed result page
2. Click the Download PDF button
3. The system will generate and download the finalized analysis report