Generate Virtual Account (VA) via Dashboard
If you prefer to generate a Virtual Account (VA) without integration or coding, Brick Dashboard allows you to do so manually through a simple user interface.
Looking to generate VA programmatically?
See the Generate VA via API guide.
How to Create a Virtual Account via Dashboard
Follow these steps to generate a Virtual Account directly from the Brick Dashboard:
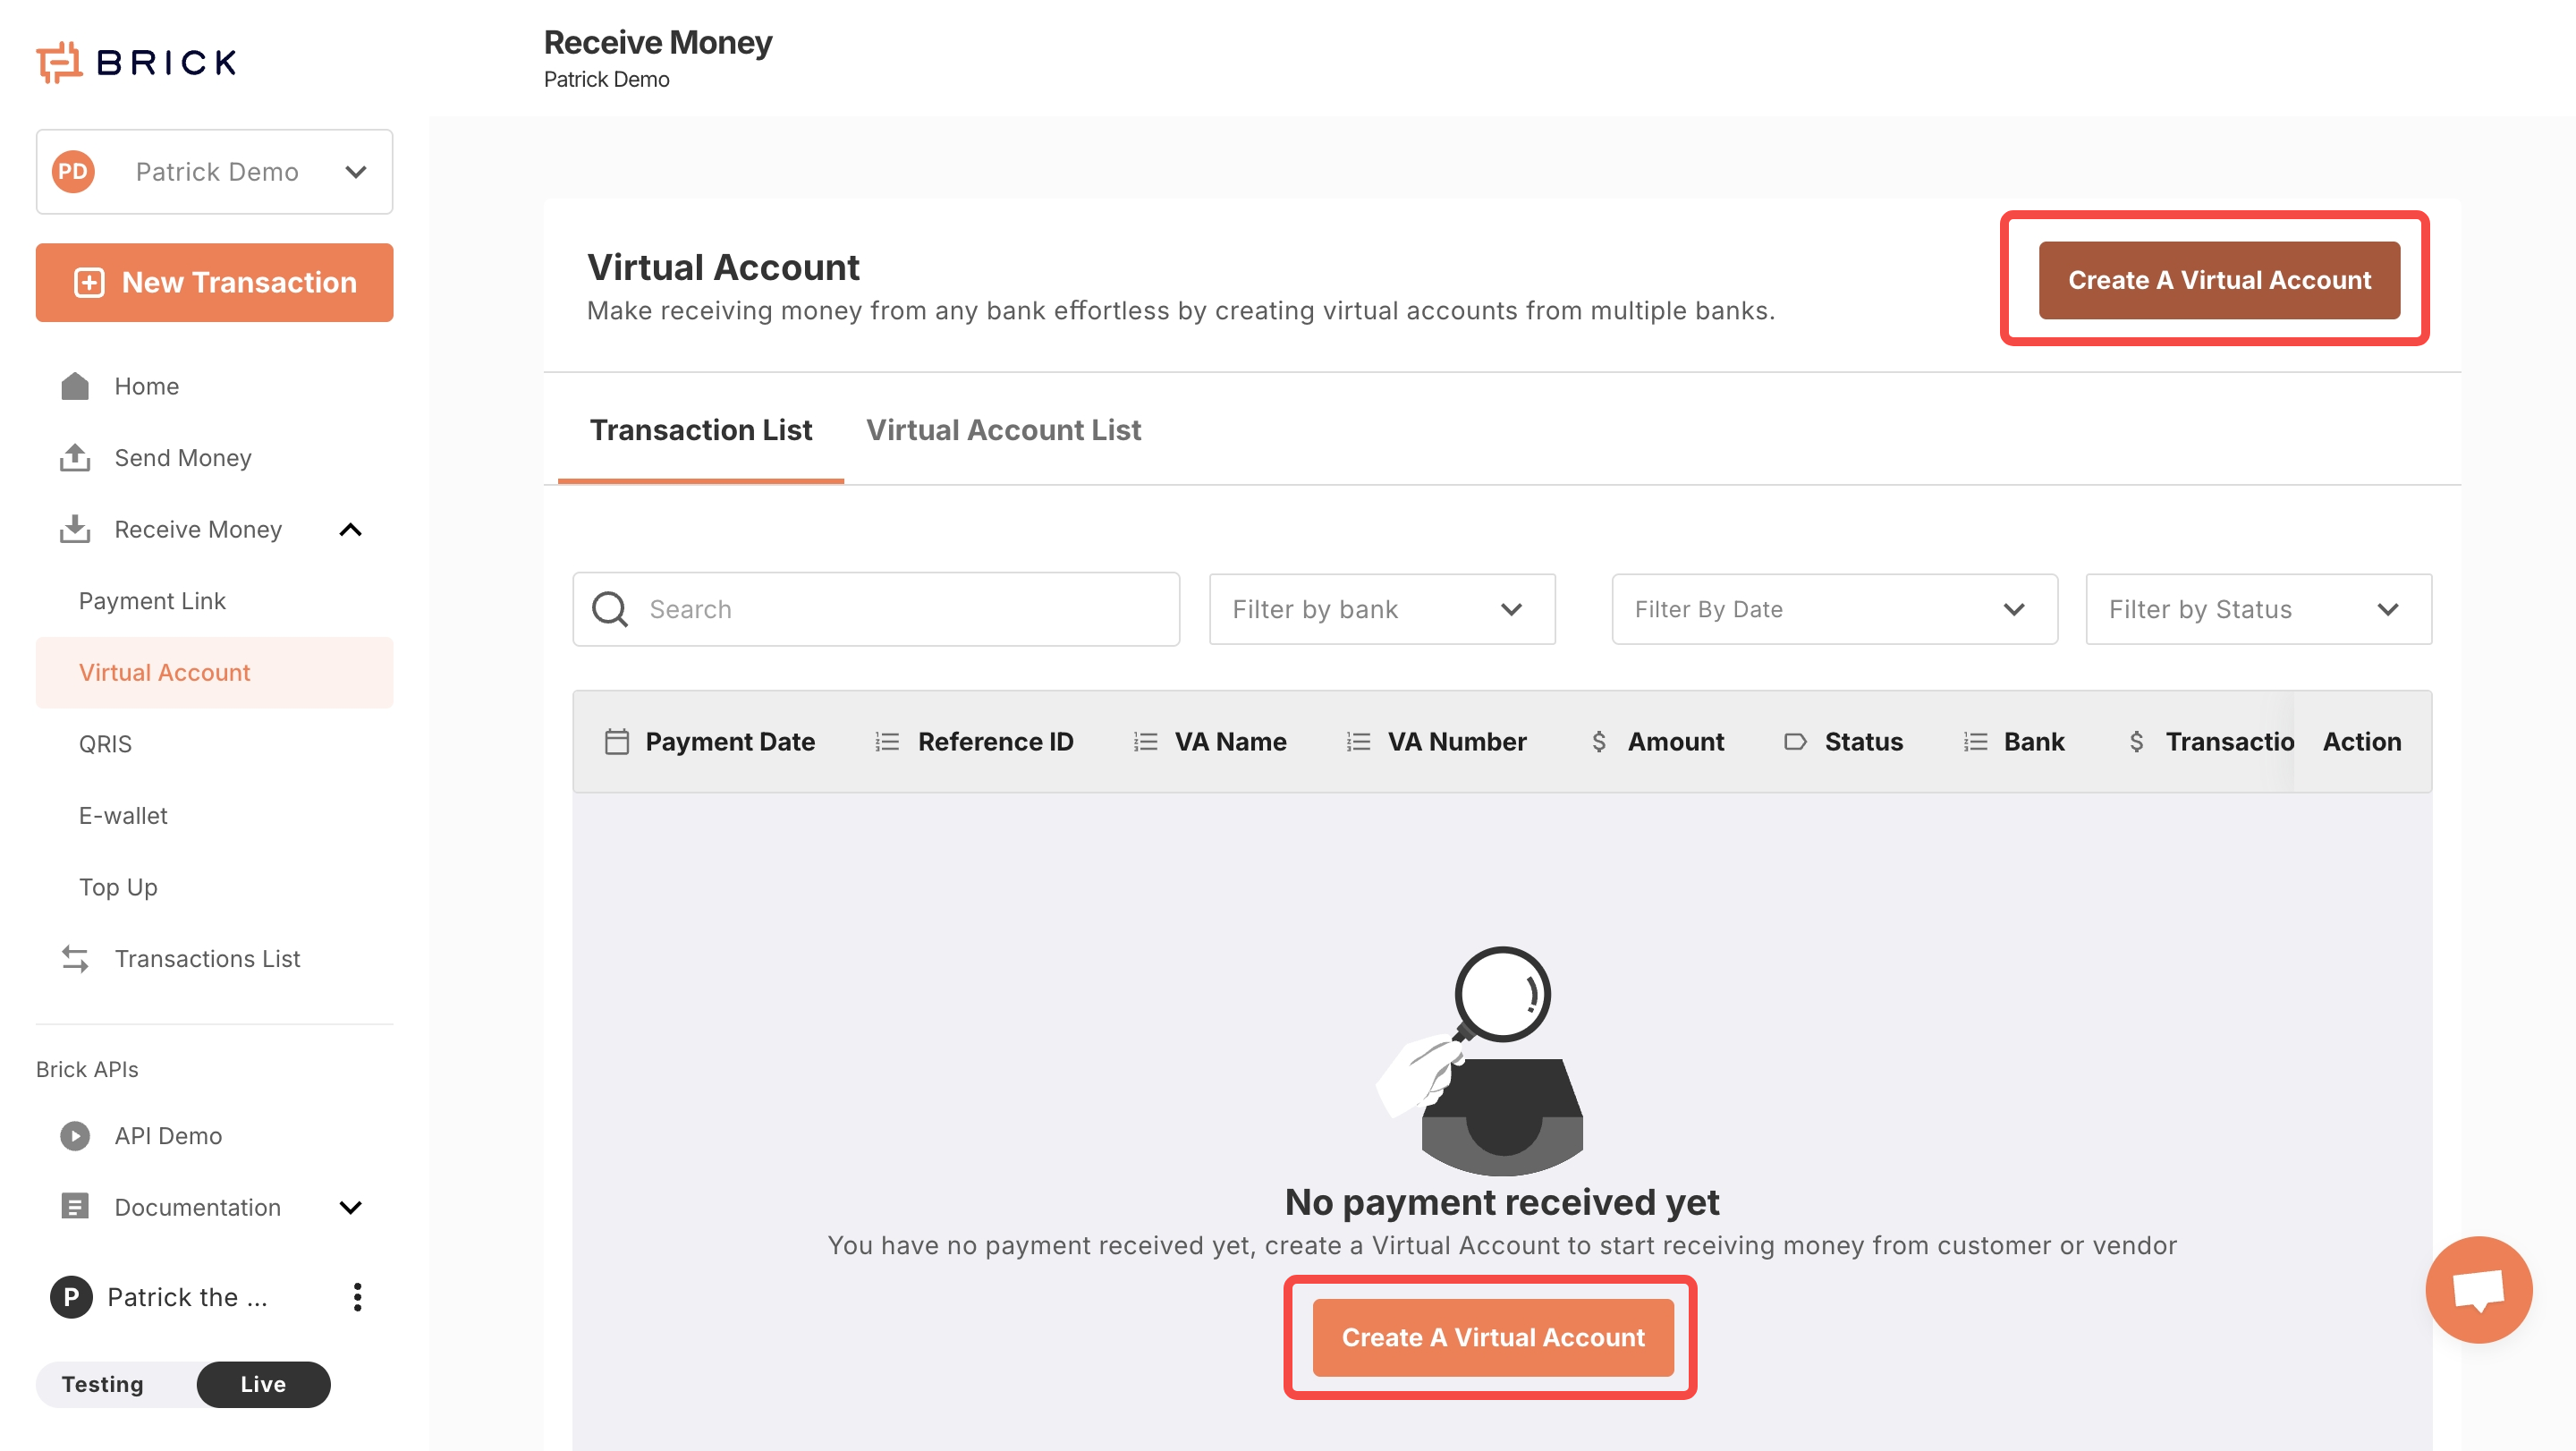
1. Access the Virtual Account Page
- Log in to your Brick Dashboard
- Navigate to: Receive Money → Virtual Account
- Click Create a Virtual Account
2. Fill in the VA Creation Form
You’ll see a form to configure the virtual account:
- VA Display Name – Auto-filled with your company prefix
- VA Type – Choose between:
- Open VA: accepts any amount
- Close VA: tied to a specific amount
- Bank – Select issuing bank
- Amount – Required if creating a Close VA
- Reference ID (Optional) – Useful for tracking or reconciling transactions
Click Create Virtual Account to confirm.
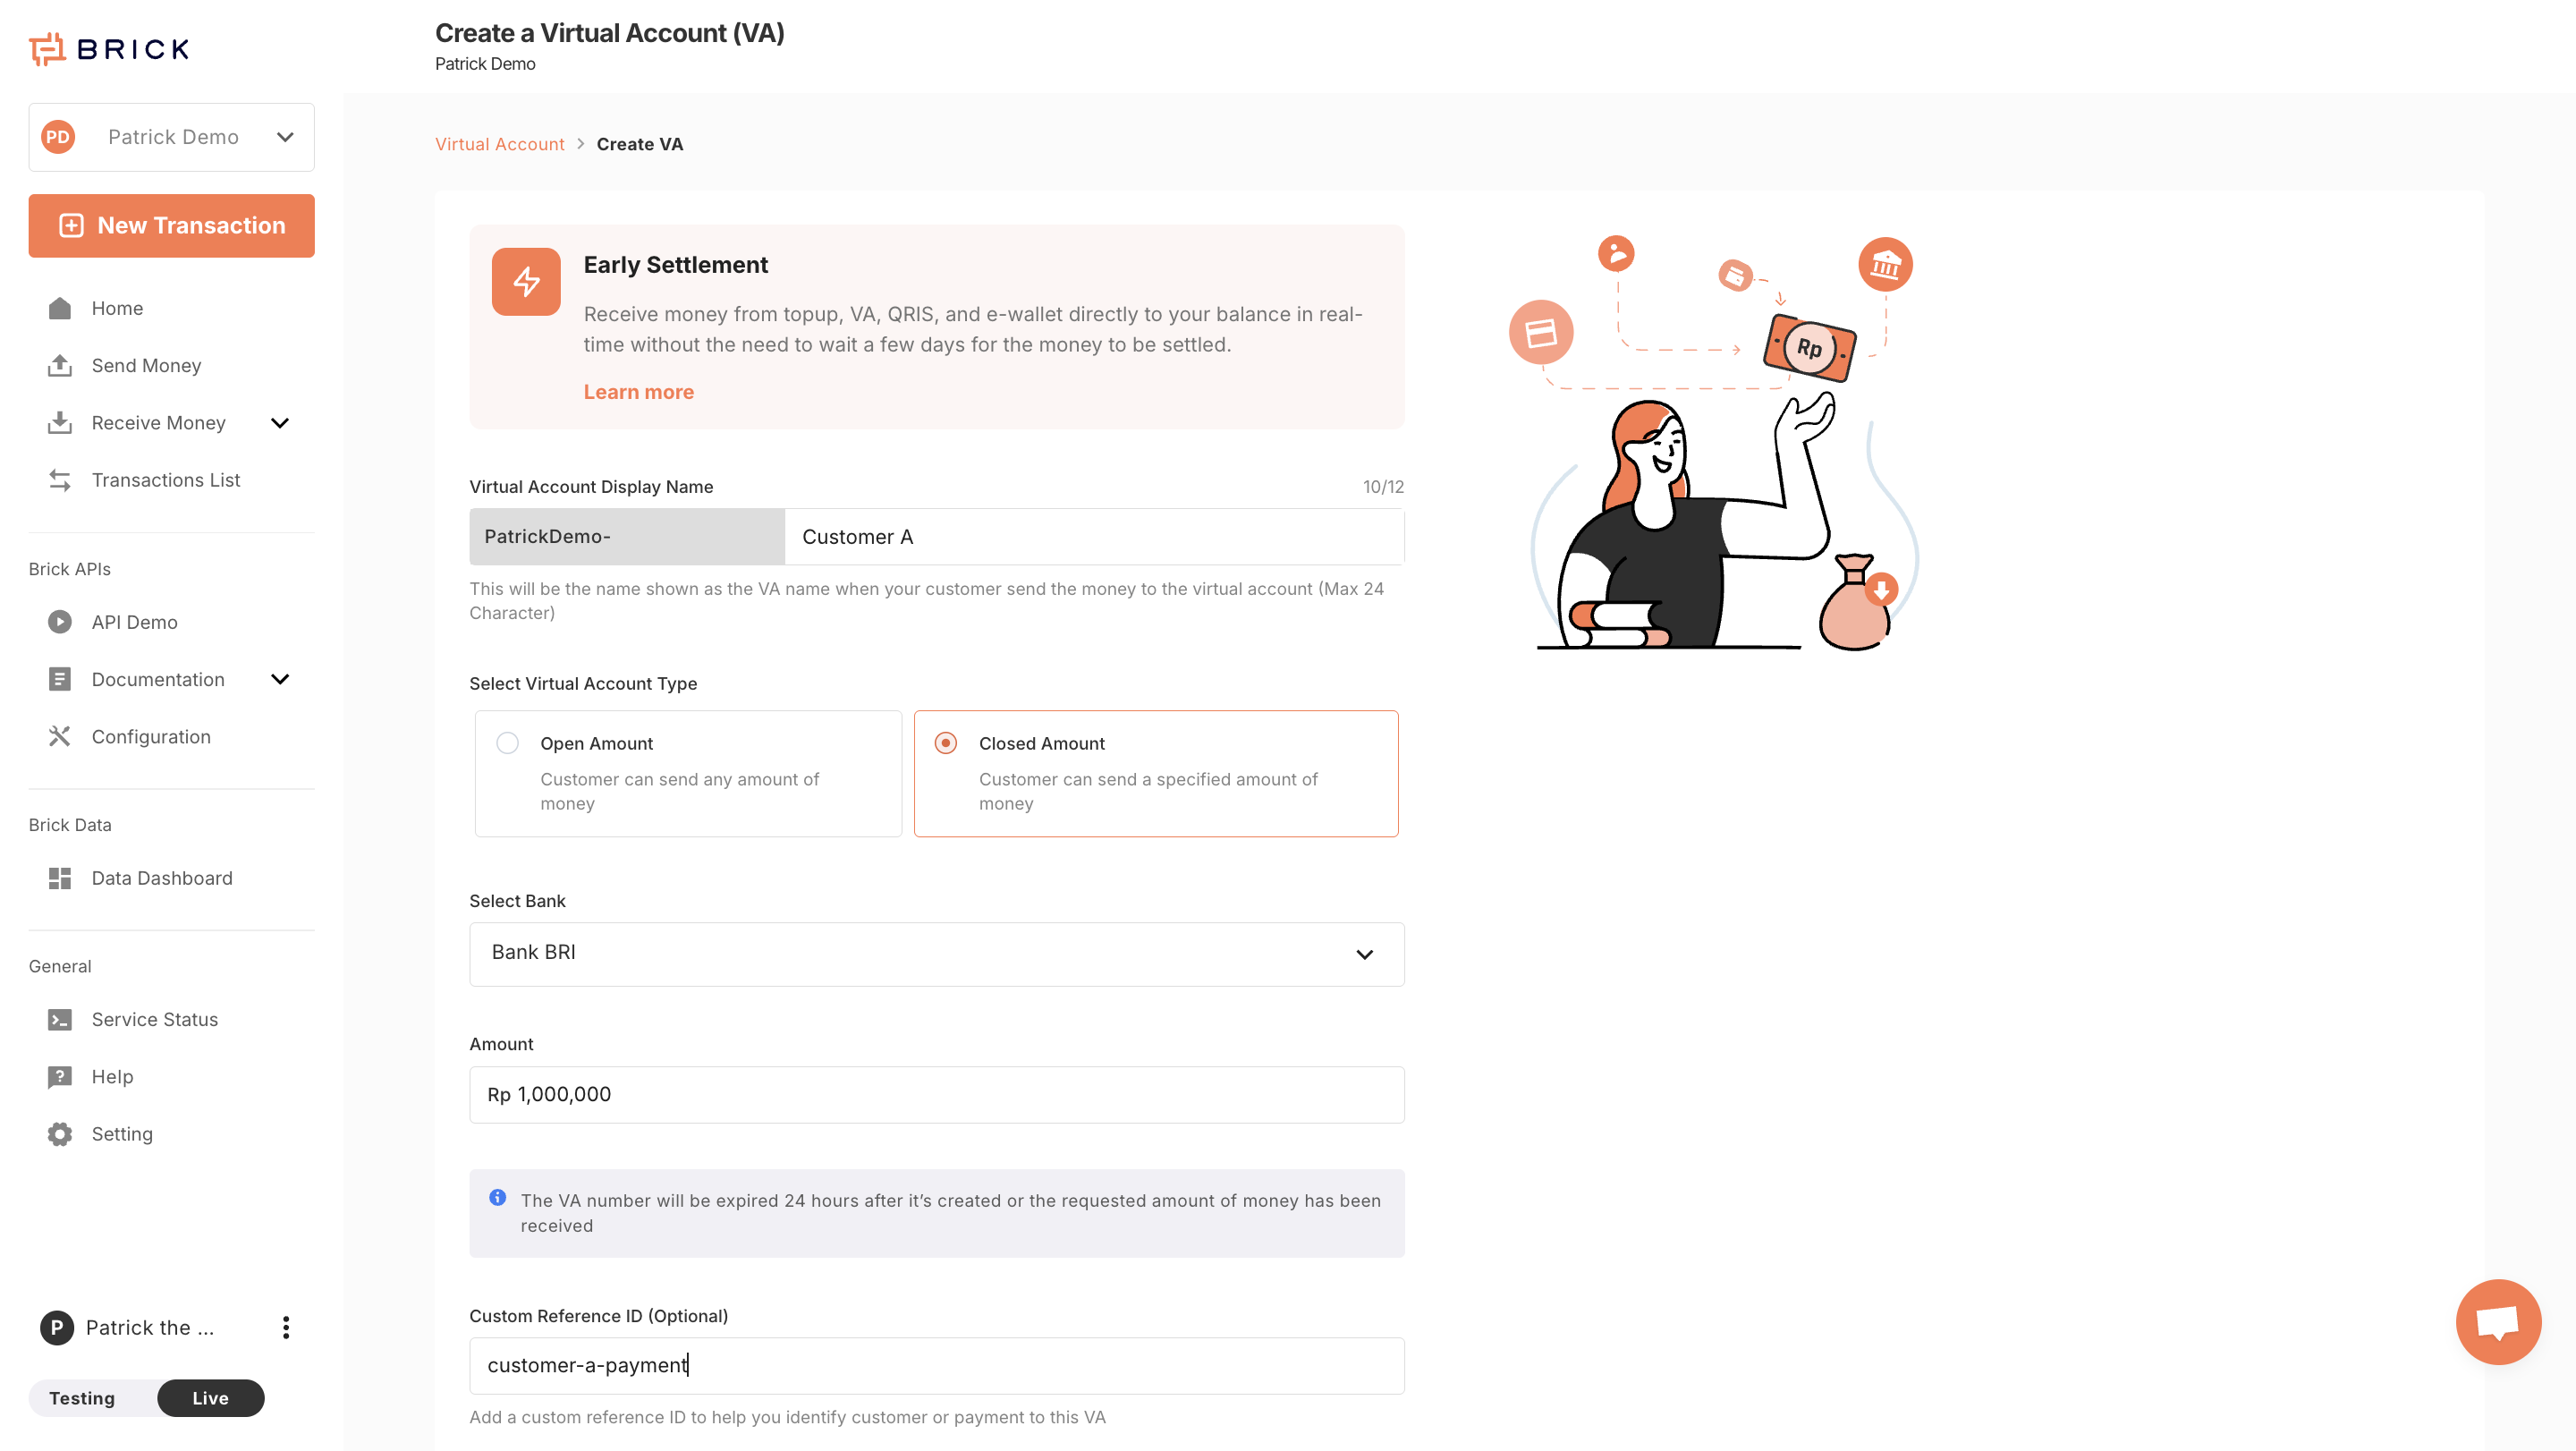
Create VA
3. View & Manage Virtual Accounts
Once created, you’ll see a list of all your VAs. From here, you can:
- View payment status
- See the VA number, type, and associated metadata
- Click on a VA to view detailed transaction history
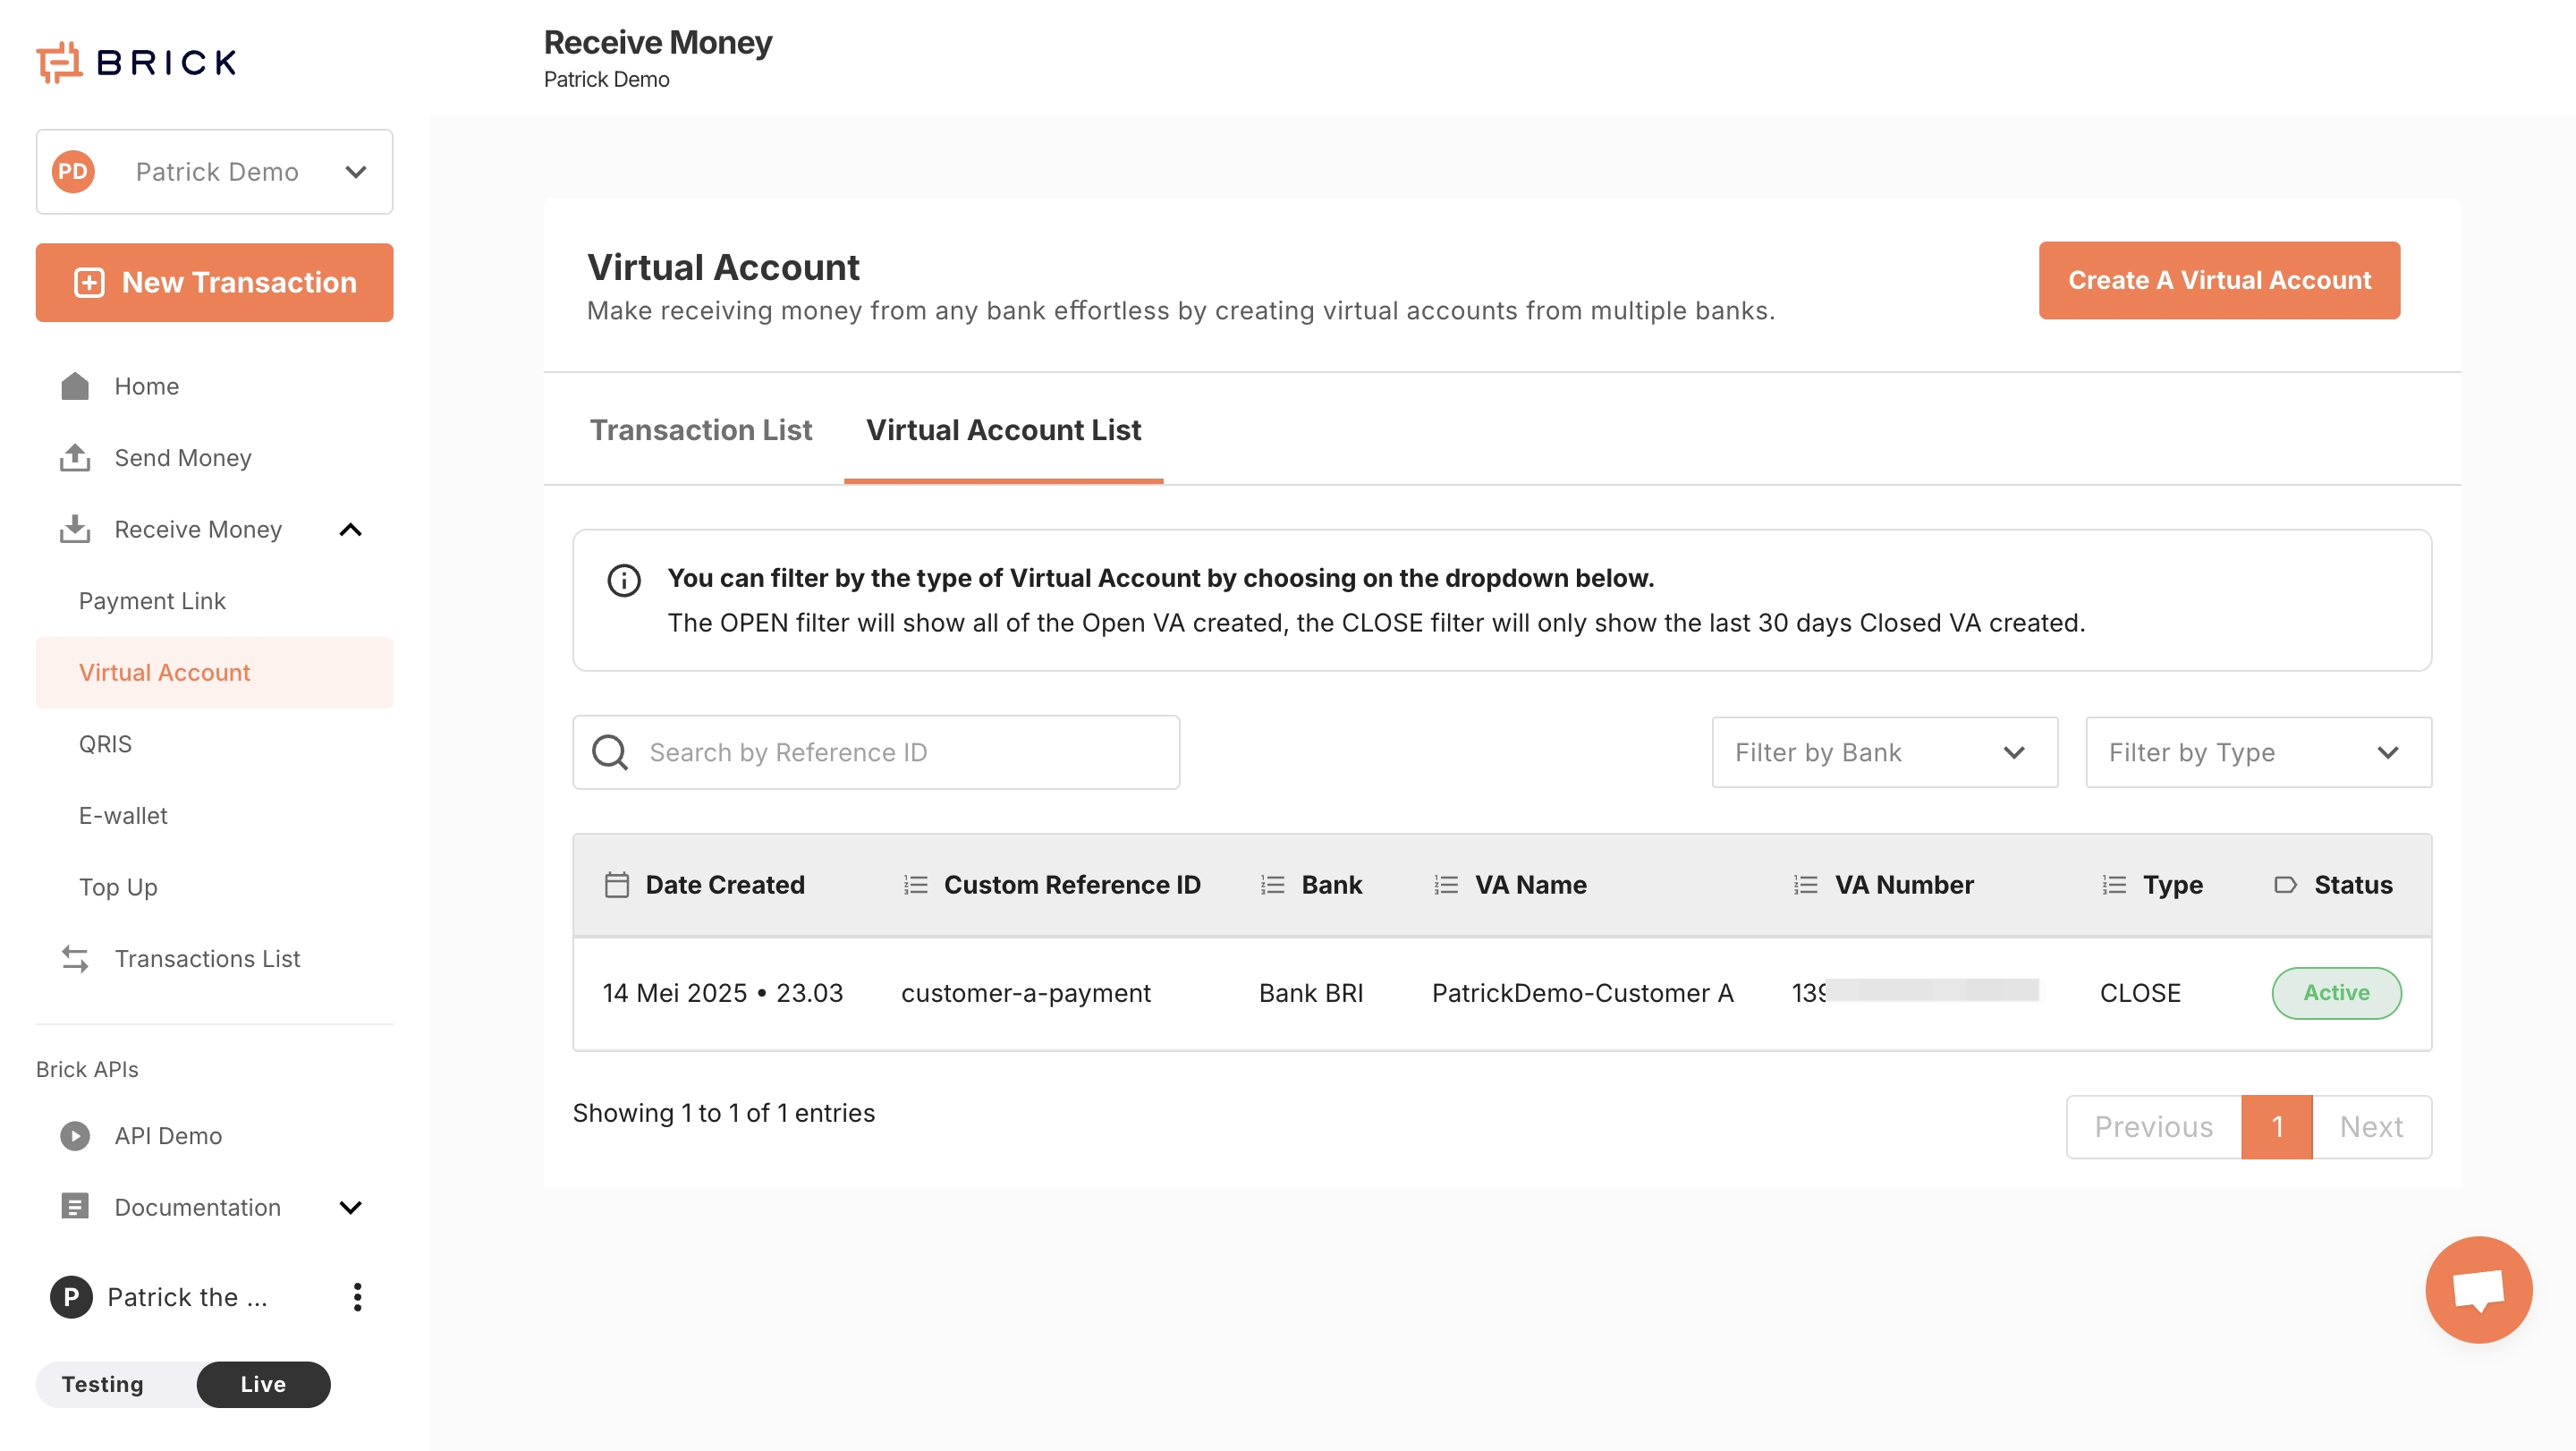
Virtual Account List Page
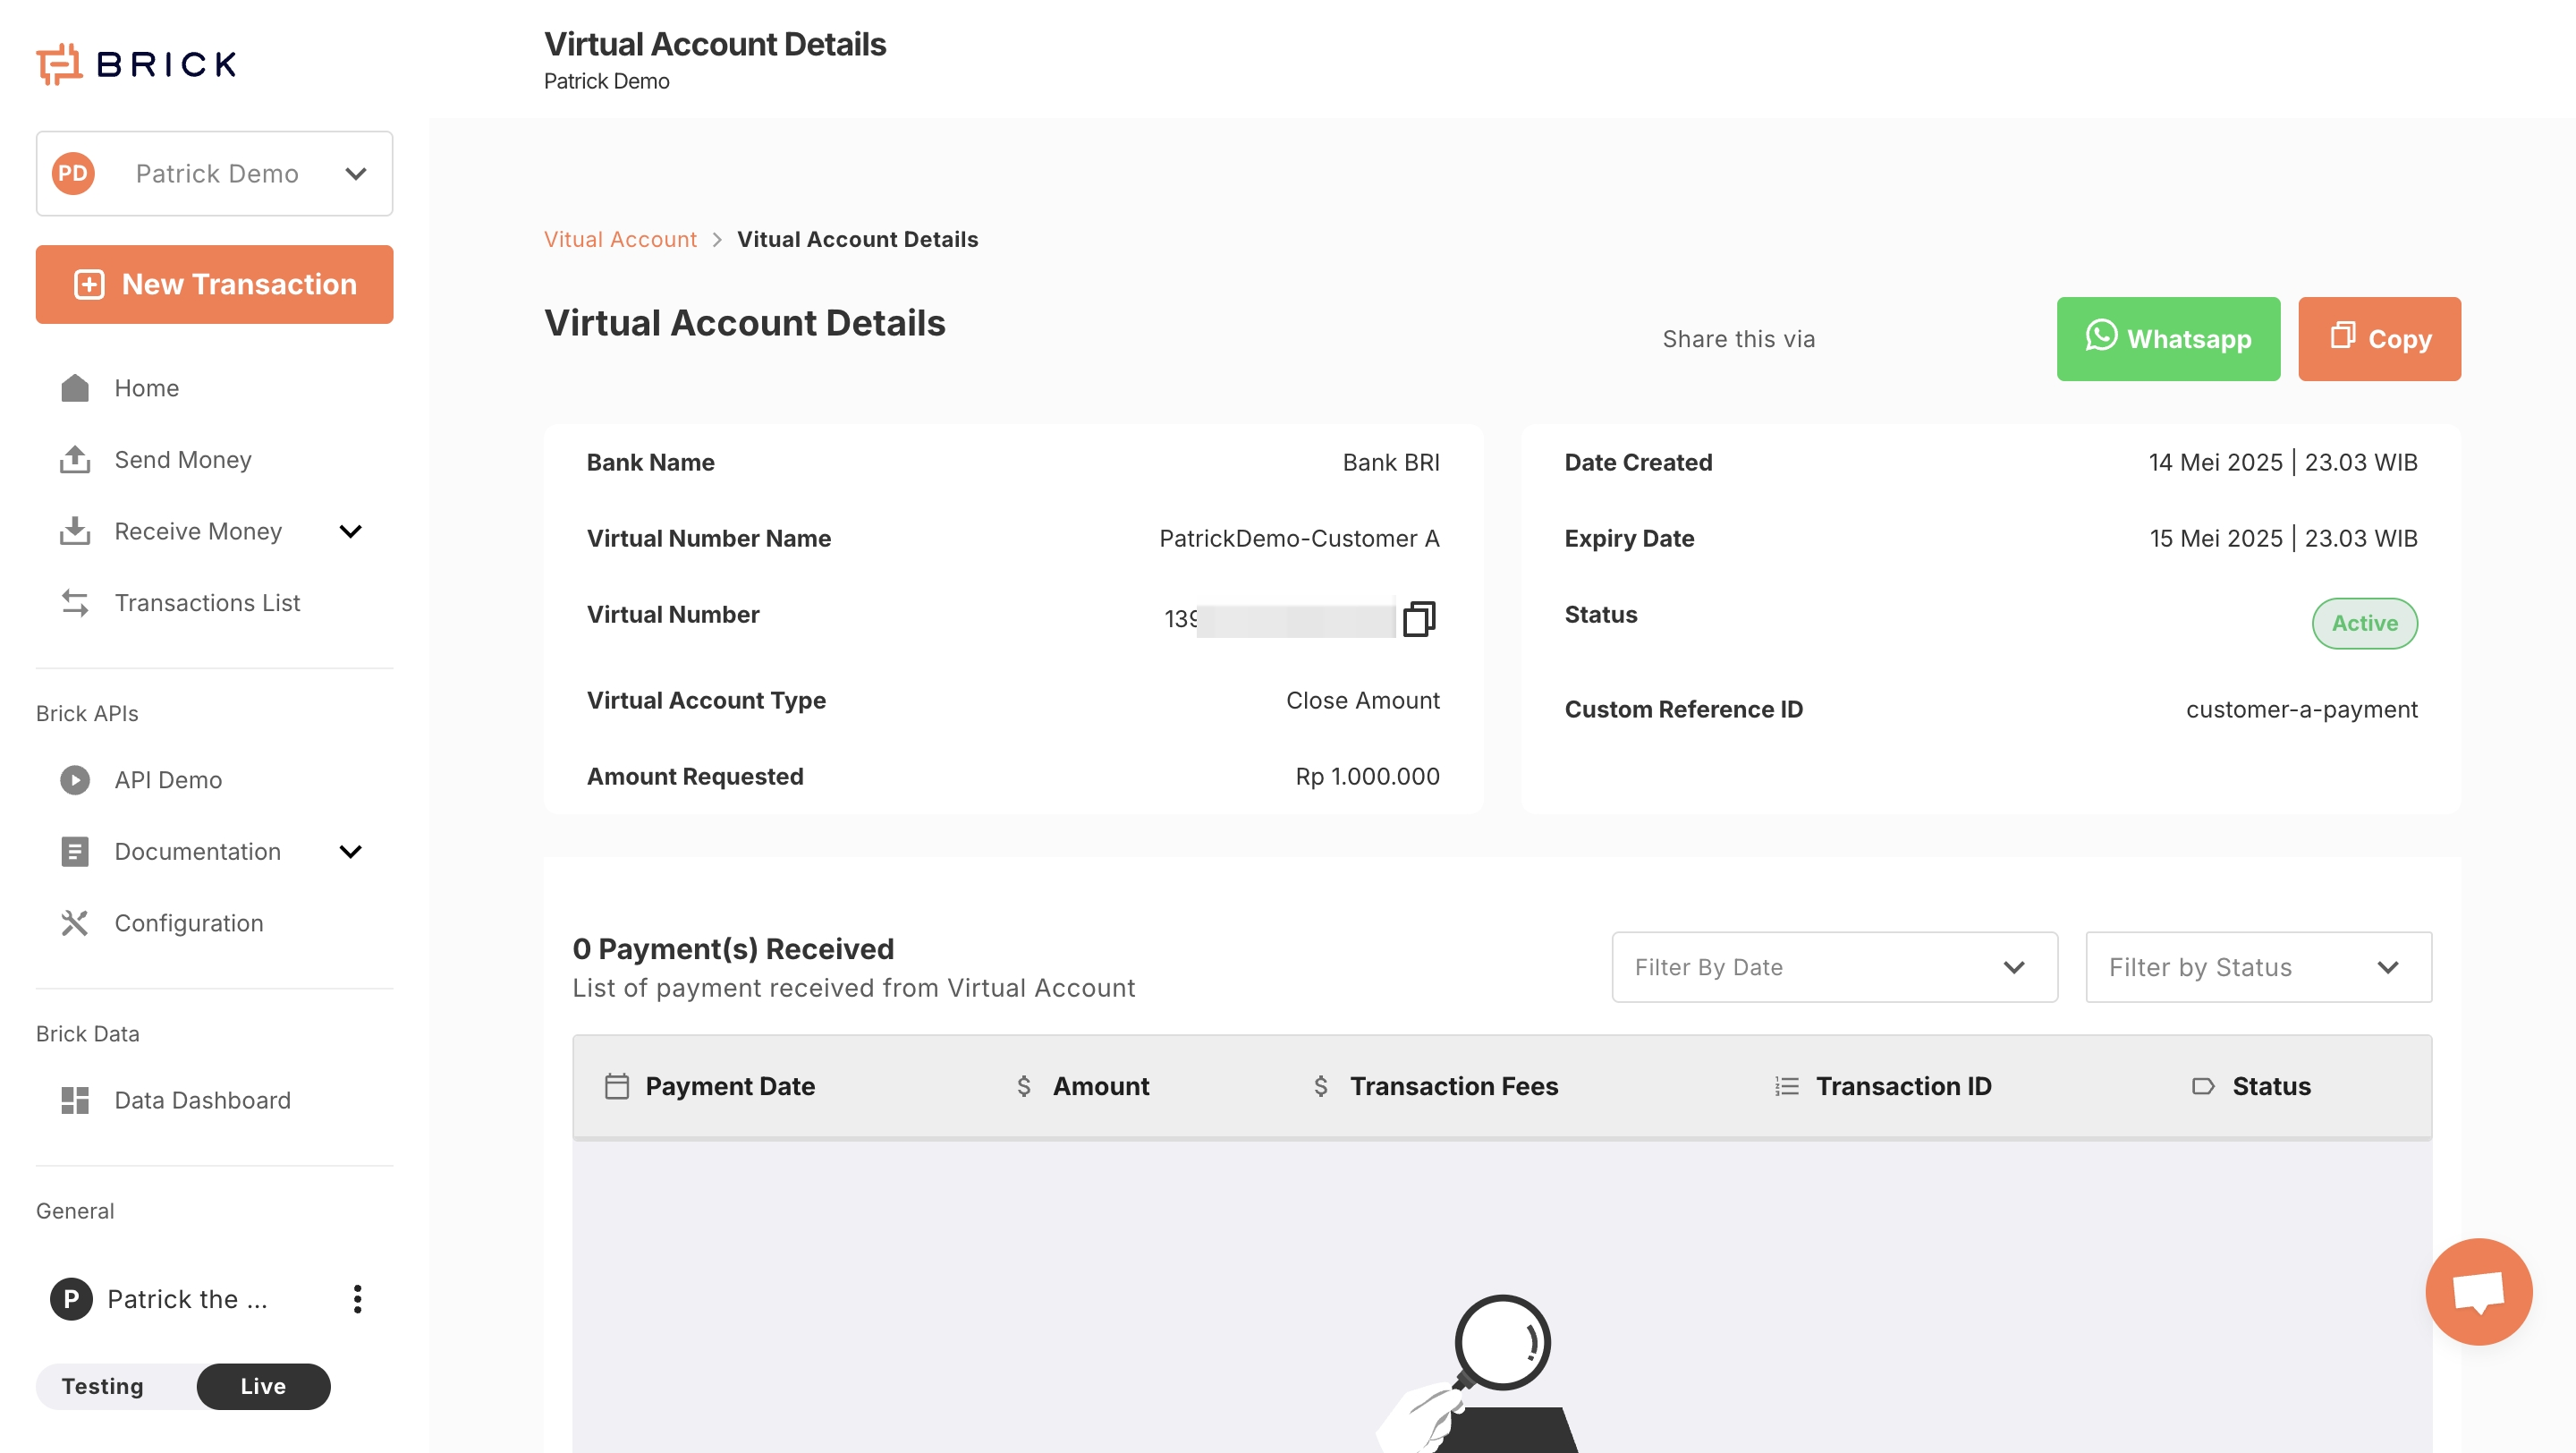
Virtual Account Detail Page
Important Note on Paying VAs:
Please avoid transferring from a different bank outside of the VA issuing bank to ensure proper routing and payment recognition.
Additional Notes
- Close VA:
- Can only be used once
- Will expire 24 hours after creation or immediately after the requested amount is fully paid—whichever comes first
- Open VA:
- Reusable and remains active indefinitely
- Currently you can't disable Open VA via Dashboard or API. If you wish to disable your open VA, please reach out our team.
Updated 9 months ago